

In the first installment of this series, we set up a new EDMX context for our Northwind database using a methodology known as Database-First (an astonishingly descriptive name, don't you think?). In this post, we're going to build our own model using a new Context and the EntityFramework designer, using a methodology called Model-First, which just means that we will build the Entity Framework model and then use it to create the database.
Our model will represent a very simple college course catalog. We will create entities for teachers, students, courses, and student addresses, and show the relationships between each.
Creating the EDMX
First, let's get started by adding a new EDMX item. Right-click on the folder where you want your model to exist, select Add New Item, then select ADO.NET Entity Data Model. I'm calling my model CourseCatalog.
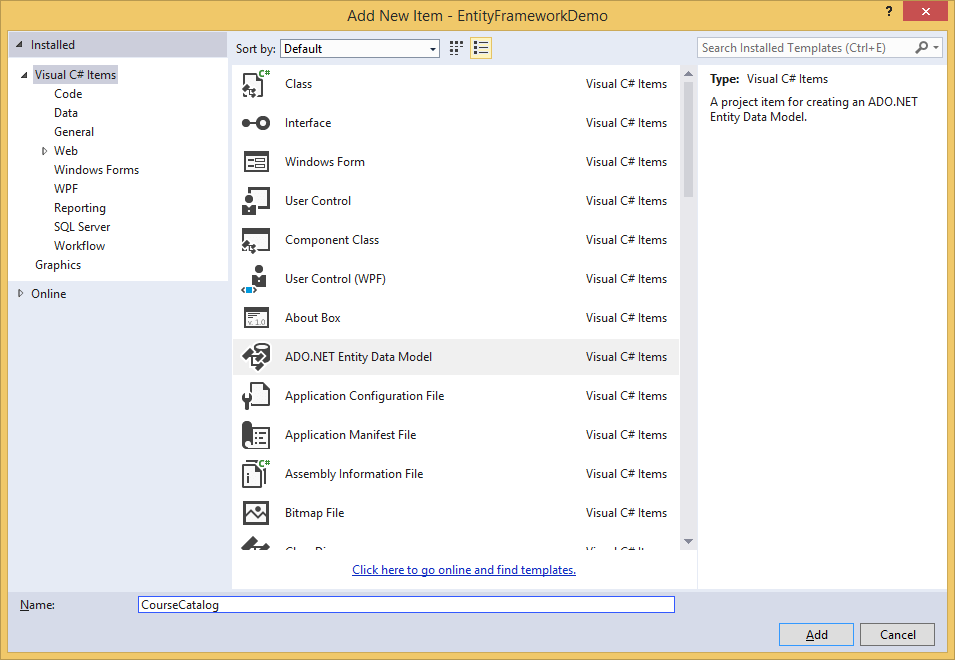
Click Add and select "Empty EF Designer Model", then click Finish.
![]()
Visual Studio will add a new EDMX file to the location you chose, and will display an empty designer canvas showing the following text:
![]()
Adding an Entity for a Student
Let's start setting up our model! First, let's create an entity for representing a Student. Right-click the designer and select Add New -> Entity:
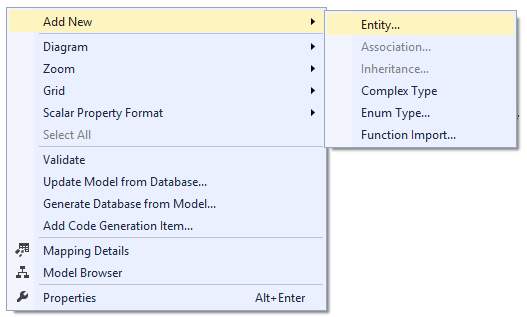
This will open the Add Entity dialog.
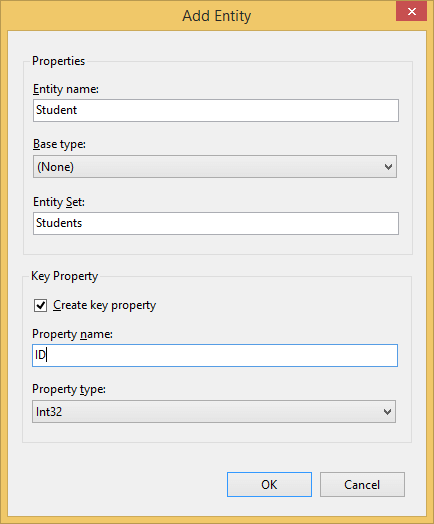
Let's break down the inputs on this dialog:
- Entity Name: Exactly what it sounds like. We're calling ours "Student." Generally speaking this will be a singular form.
- Base Type: If the new entity will be inheriting from another entity, you can use this dropdown to select the base entity.
- Entity Set: The name of the collection of this kind of entity the Context will produce. Generally this will be the plural form of the Entity Name.
- Key Property: The details about a key column that you want to create.
In this case, we are creating an entity Student with key ID. The resulting entity looks like this:
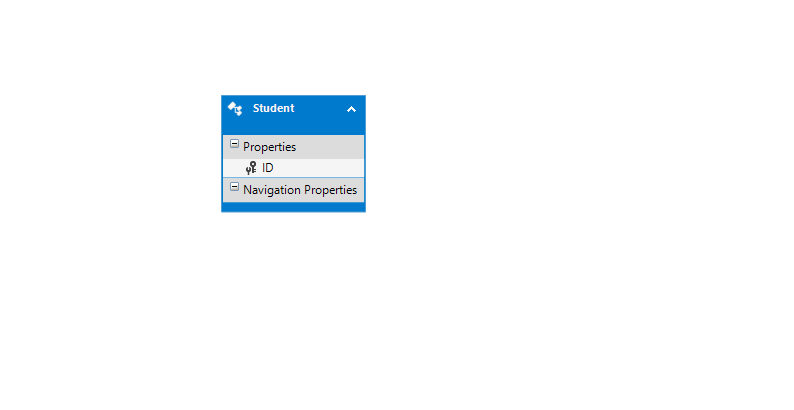
Now we have a Student, with a single property ID. Let's add some more properties to the Student entity. Right-click on the entity and select Add New -> Scalar Property
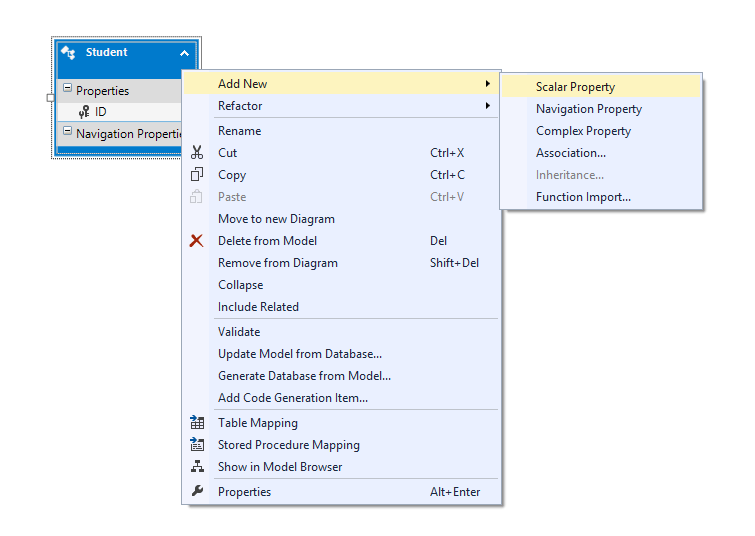
Scalar Properties are properties of the entity that contain a value. In our case, let's add a property for FirstName:
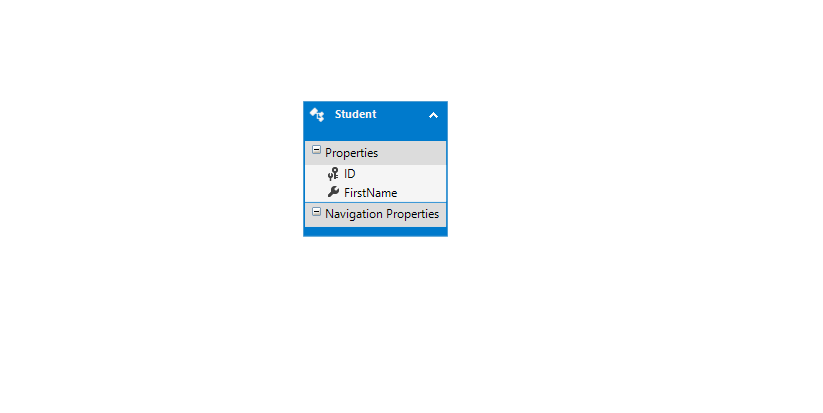
Check out the Properties window when selecting FirstName to see the details of the property:
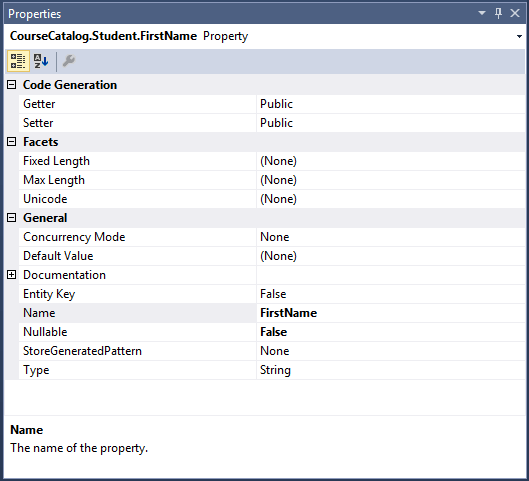
A few properties you'll want to be aware of:
- Nullable: Whether this property can be null.
- Type: The .NET type of this property.
- Default Value: If an instance of this entity is created, the default value used for this property.
- Max Length: The maximum length of the data. In the case of strings, corresponds to the nvarchar(X) in SQL Server, where the X is the max length.
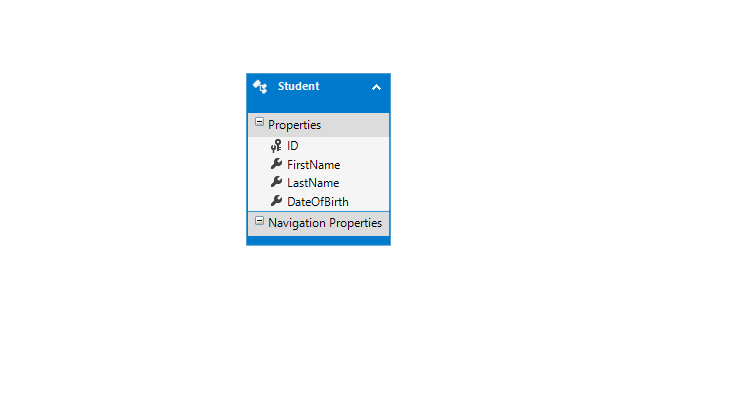
In our case, the properties are already what we want. Let's add two more properties, a string LastName and a datetime DateOfBirth. For DateOfBirth, remember to change the Type in the Properties window.
Now we have our completed Student entity:
Adding Other Entities
Now let's create a new entity for StudentAddress, with properties ID, StreetAddress, City, State, and PostalCode:
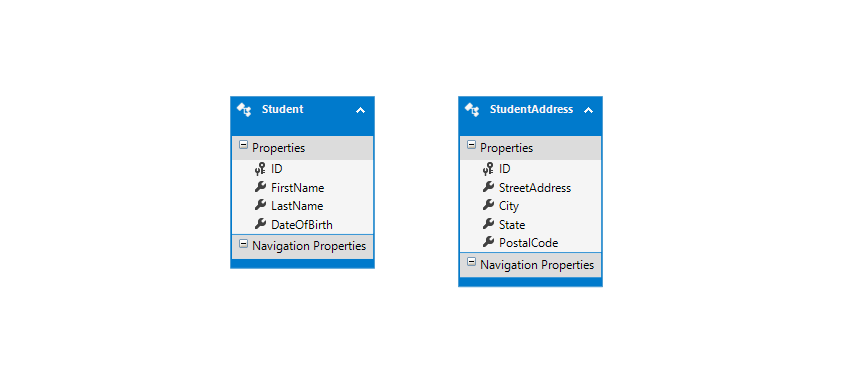
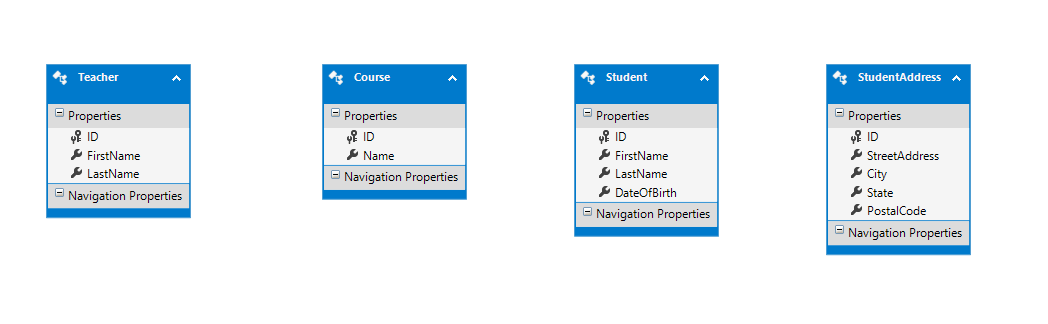
Finally, let's add entities for Teacher and Course.
Creating Relationships
Now that we've got all of our entities defined, we can start creating the relationships between them.
First, let's consider the relationship between Student and StudentAddress. In the real world, we would expect a person to have at least one resident address; however, it is possible (albeit unlikely) that a student doesn't have an address and is homeless. Therefore, a Student could have 1 address or could have 0 addresses, and an address must have a related Student This is a 1-to-0-or-1 relationship.
We build this relationship by right-clicking on Student and selecting Add New -> Association. This brings up the Association dialog.
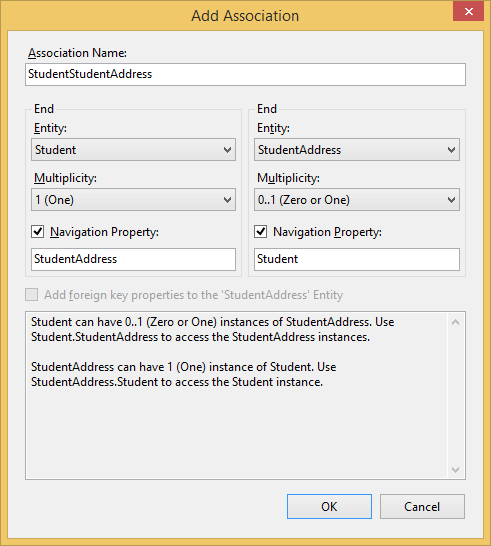
Because this relationship is 1-to-0-or-1, we set the left end as Student with multiplicity 1 and the right end as StudentAddress with multiplicity 0..1. This ensures that a Student may have a related Address, and an Address must have a related Student. Click OK to create the association.
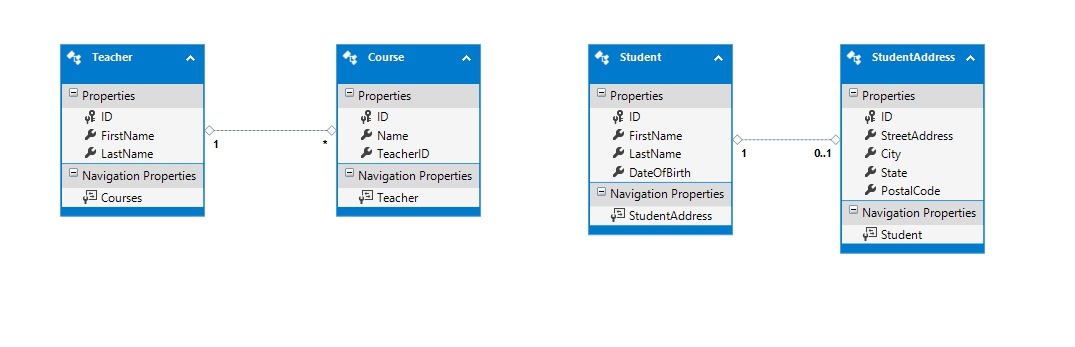
Now our model looks like this:

Note that creating the relationship added a navigation property to each entity.
Now let's consider the relationship between Teacher and Course. This being a school, it can be reasonably assumed that one Teacher would teach many Courses. For the sake of simplicity (and because I need this assumption so I can show this kind of relationship) we will also assume that only one Teacher can teach a Course. That makes this relationship 1-to-many: that is, one Teacher can teach many Courses, and one Course must have exactly one Teacher.
Let's add another association:
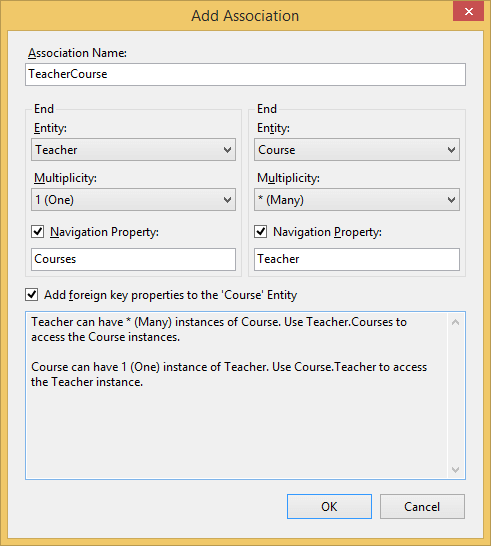
This time, note the "Add foreign key properties to the 'Course' Entity" checkbox. With this checked, creating the association will add the foreign key column to the entity on the "many" side of the relationship, in this case Course.
Creating this association makes our Model look like this:
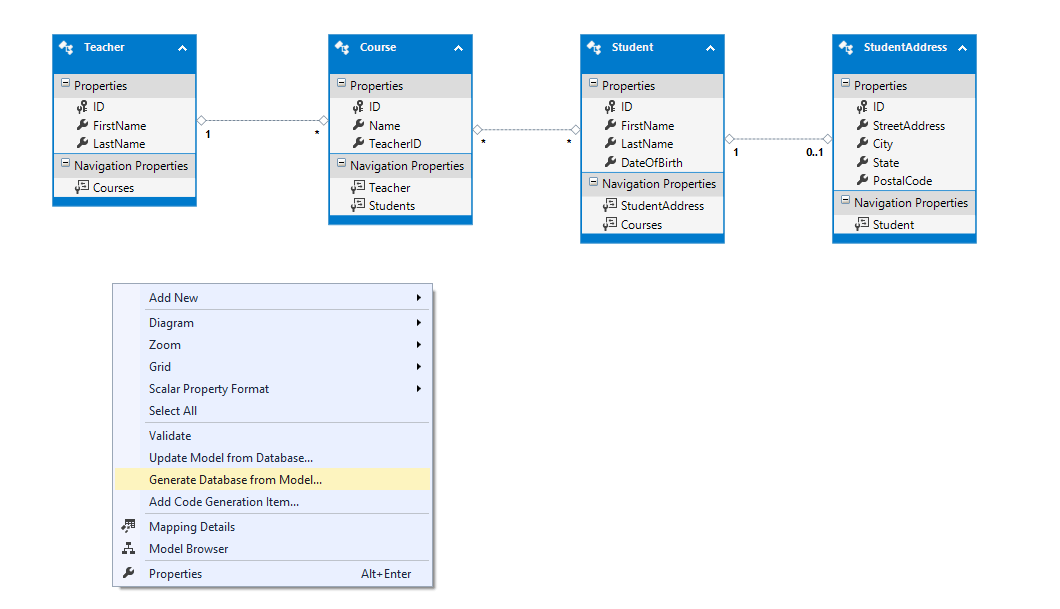
Finally, let's consider the relationship between Student and Course. A single student can take many courses, and a single course will (hopefully) have many students. Therefore this is a many-to-many relationship. Let's create that relationship in the designer:


Publishing the Model to a Database
Now that we've got the model fully worked out, we can show how Entity Framework allows us to use a model to create a database. In this case, we'll be using a local CourseCatalog.mdf database in the project, which you can get on GitHub.
First, right-click on the model canvas, and select Generate Database from Model:
Then, choose the connection you want to use (I'm using a local database):
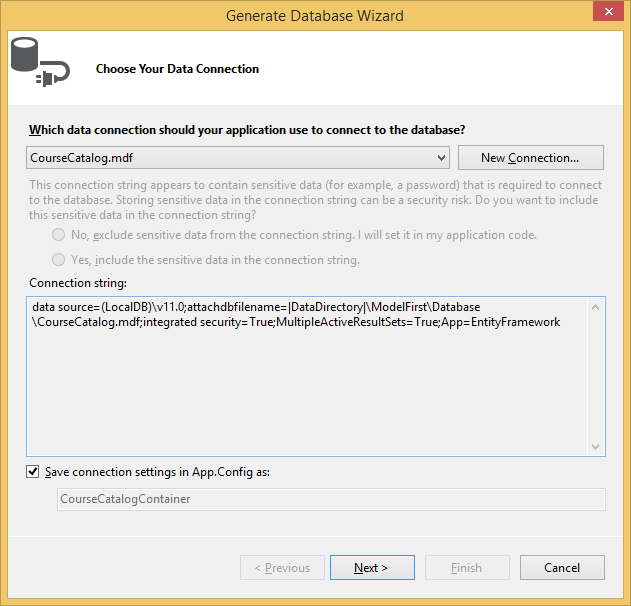
Click Next and you will see the SQL script necessary to create the tables, columns, and relationships for this database:
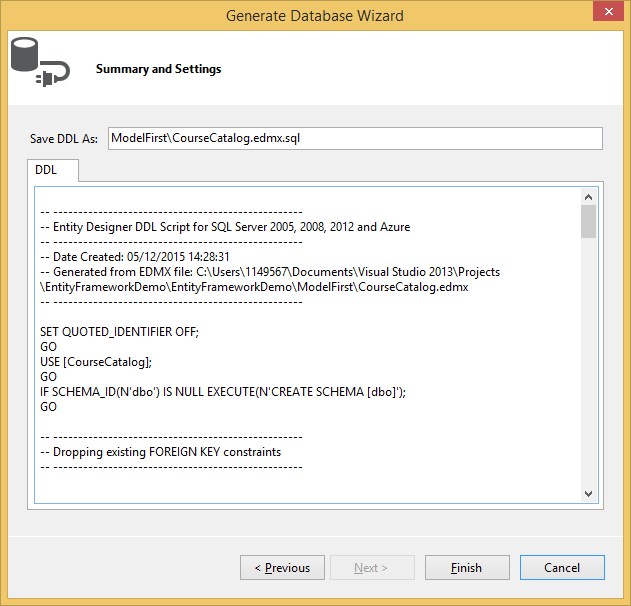
Click Finish to create the script necessary to create the database. Once you've got that script, execute it and your database will be ready to go.
Here's my completed database:

Congratulations! Now you've completed making a model from scratch using Entity Framework and using that model to create a database! Stick around for the next post in this series, where we will return to the Northwind database and whip it into shape use it to explore creating a Code-First model.
Happy Coding!