

Entity Framework Code-First includes a new feature for maintaining database changes in code files: Migrations.
Migrations are code files that describe what changes were made to the database schema at different points in time. You create the migrations when you need them, and the code will use those files (and a corresponding table in the target database) to keep the schema changes in sync with what the code expects. In other words, you can manage your database schema without ever writing any SQL.
For this demo, we'll be using the same sample project we used when creating a Code-First model using Attributes and when creating that same model using FluentAPI. Let's get started!
Enabling Migrations
Before we can use them, we must enable Migrations for a given project. Migrations are enabled and interfaced with via a command-line-like interface in Visual Studio called the Package Manager Console. In order to enable migrations, we must run the following command on that window:
PM> enable-migrations
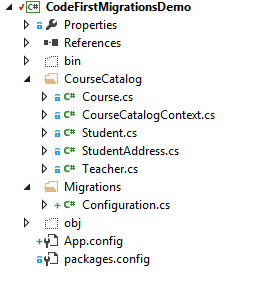
That creates a Migrations folder containing a new class called Configuration:
In the Configuration class, we'll see two methods: the constructor and Seed().
The constructor sets one particularly important property: AutomaticMigrationsEnabled. This property determines whether or not the database will automatically roll to the newest migration whenever the code is deployed and accessed. This can be pretty useful, but also fairly dangerous if you fail to set up your migrations properly.
The other method, Seed(), can seed the database with sample data should you need such. You can find a nice walkthrough of this over at asp.net.
Creating a Migration
Once we've got migrations enabled, we can create the first one. We'll do that via this command:
PM> add-migration InitialSetup
This adds a file to our Migrations folder:
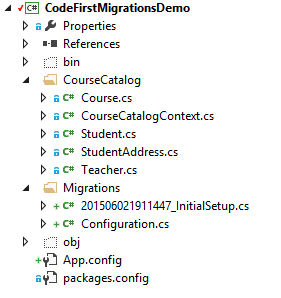
Note that the name of the file is simply a timestamp followed by the name of the migration. This naming is important, because Migrations keeps these files in chronological order.
Contents of a Migration
Inside the newly-created migration file we will find two methods: Up() and Down().
public partial class InitialSetup : DbMigration
{
    public override void Up()
    {
        CreateTable(
            "dbo.Courses",
            c => new
                {
                    ID = c.Int(nullable: false, identity: true),
                    Name = c.String(nullable: false),
                    TeacherID = c.Int(nullable: false),
                })
            .PrimaryKey(t => t.ID)
            .ForeignKey("dbo.Teachers", t => t.TeacherID, cascadeDelete: true)
            .Index(t => t.TeacherID);

        CreateTable(
            "dbo.Students",
            c => new
                {
                    ID = c.Int(nullable: false, identity: true),
                    FirstName = c.String(nullable: false, maxLength: 100),
                    LastName = c.String(nullable: false, maxLength: 100),
                    DateOfBirth = c.DateTime(nullable: false),
                })
            .PrimaryKey(t => t.ID);

        ...
    }

    public override void Down()
    {
        DropForeignKey("dbo.Courses", "TeacherID", "dbo.Teachers");
        ...
        DropTable("dbo.Teachers");
        DropTable("dbo.StudentAddresses");
        DropTable("dbo.Students");
        DropTable("dbo.Courses");
    }
}
As you probably guessed, the Up() method is used when applying the migration to a database; it specifies what tables to create, as well as establishing keys, indexes, and relationships.
The Down() method is more interesting though, because it is used to rollback a migration. That's right, you can use Migrations to rollback changes made to your database. We'll see how to do this in just a second, but first we need to update the database.
Updating the Database
Once we've got the migration created, we can update the database by using the command
update-database
There's also a few flags we can use for this command (there are more):
- -script: Generates a SQL Script rather than updating the database.
- -force: Specifies that we are to ignore possible data loss when making this update.
- -verbose: Outputs the specific SQL statements to the PMC that are being run.
Running this command produces the following tables:
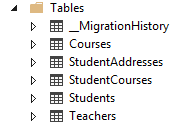
Now our database is up-to-date with our migrations. But how does it keep track?
Notice the __MigrationHistory table. In this table, Entity Framework will store each Migration that has been executed against the database. This is how EF knows which migration to run when executing update-database; it just looks for migrations that don't exist in this table.
Making a Schema Change
Let's say we wanted to add a new entity for Building. Each Building can host many Courses, so their relationship is Building 1-to-n Course. The model might look something like this:
public class Building
{
    [Key]
    [DatabaseGenerated(DatabaseGeneratedOption.Identity)]
    public int BuildingID { get; set; }

    [Required]
    public string Name { get; set; }

    public virtual ICollection<Course> Courses { get; set; }
}
We'd also need to modify Course.cs:
public class Course
{
    [Key]
    [DatabaseGenerated(DatabaseGeneratedOption.Identity)]
    public int ID { get; set; }

    [Required]
    public string Name { get; set; }

    public virtual ICollection<Student> Students { get; set; }

    public int TeacherID { get; set; }

    public int BuildingID { get; set; }

    [ForeignKey("TeacherID")]
    public virtual Teacher Teacher { get; set; }

    [ForeignKey("BuildingID")]
    public virtual Building Building { get; set; }
}
Finally, we'd need to make changes to CourseCatalogContext:
public class CourseCatalogContext : DbContext
{
    public virtual DbSet<Student> Students { get; set; }
    public virtual DbSet<StudentAddress> StudentAddresses { get; set; }
    public virtual DbSet<Course> Courses { get; set; }
    public virtual DbSet<Teacher> Teachers { get; set; }
    public virtual DbSet<Building> Buildings { get; set; }
}
Once all of these changes are complete, we can create a new Migration for this change:
PM> add-migration Buildings
Once the migration is created, we can update the database:
PM> update-database
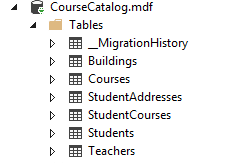
Now we have created the Buildings table.
Rolling Back a Migration
Let's pretend that the Building improvements didn't take, or weren't going to be needed after all, and we needed to roll them back. We can do so by using update-database and specifying which migration we want to roll back to using the TargetMigration flag:
update-database -TargetMigration InitialSetup
This command runs the Down() method we talked about earlier to create the SQL script that will remove the database objects that were part of this migration. In our case, it would remove the Building table and the relationship to Course.
Whew! That was a lot to go through. But with Code-First Migrations enabled and ready, you can manage your database schema without ever needing to write a single line of SQL. Pretty neat, huh?
Don't forget to check out the sample project on GitHub, and happy coding!