

In this part, we're going to further improve our drawing canvas by adding an undo/redo functionality. To accomplish this, we have to implement a state manager system which keeps track of the various states of the canvas and the objects on it. It's not as bad as it sounds, I promise. Let's go!

The Sample Project
As I'm sure you're aware by now, there's a sample project that goes along with this series of posts. Check it out!

The State Manager
In order to accomplish this undo/redo functionality, we need a class that will keep track of the various states of the drawing canvas. Said class will need to keep a representation of the canvas in JSON, so that said representation can be easily restored.
Lucky for us, FabricJS already provides a way to get the JSON for the canvas: the method toDatalessJSON(). By using this method, we can get the complete state of the canvas at any given time.
The state manager itself will need to keep a stack of states, so that we can pop off the top state to undo. It will also need to keep a separate stack of popped states, so that we can redo.

Let's see the annotated code for our StateManager class:
class StateManager {
    private currentState: string;
    private stateStack: string[]; //Undo stack
    private redoStack: string[]; //Redo stack
    private locked: boolean; //Determines if the state can currently be saved.
    private maxCount: number = 100; //We keep 100 items in the stacks at any time.

    constructor(readonly canvas: fabric.Canvas) {
        this.currentState = canvas.toDatalessJSON();
        this.locked = false;
        this.redoStack = [];
        this.stateStack = [];
    }

    saveState() {
        if (!this.locked) {
            if (this.stateStack.length === this.maxCount) {
                //Drop the oldest element
                this.stateStack.shift();
            }

            //Add the current state
            this.stateStack.push(
                this.currentState
            );

            //Make the state of the canvas the current state
            this.currentState = this.canvas.toDatalessJSON()

            //Reset the redo stack.
            //We can only redo things that were just undone.
            this.redoStack.length = 0;
        }
    }

    //Pop the most recent state. Use the specified callback method.
    undo(callback?: Function) {
        if (this.stateStack.length > 0)
            this.applyState(this.redoStack, this.stateStack.pop(), callback);
    }

    //Pop the most recent redo state. Use the specified callback method.
    redo(callback?: Function) {
        if (this.redoStack.length > 0)
            this.applyState(this.stateStack, this.redoStack.pop(), callback);
    }

    //Root function for undo and redo; operates on the passed-in stack
    private applyState(stack: string[], newState, callBack?: Function) {
        //Push the current state
        stack.push(this.currentState);

        //Make the new state the current state
        this.currentState = newState;

        //Lock the stacks for the incoming change
        const thisStateManager = this;
        this.locked = true;

        //Update canvas with the new current state
        this.canvas.loadFromJSON(this.currentState, function () {
            if (callBack !== undefined)
                callBack();

            //Unlock the stacks
            thisStateManager.locked = false;
        });
    }
}
Now our question is, how do we use this class?
Modifications to DrawingEditor
We must make a few modifications to the root DrawingEditor class.
First, we need some shortcut methods to allow the DrawingEditor to undo, redo, and save the current state:
class DrawingEditor {
    stateManager: StateManager;
    //...Other properties

    constructor(private readonly selector: string,
        canvasHeight: number, canvasWidth: number) {
        //...Initialize canvas

        this.stateManager = new StateManager(this.canvas);

        //...
    }

    //...Other methods

    undo(): void {
        this.stateManager.undo();
    }

    redo(): void {
        this.stateManager.redo();
    }

    private saveState() {
        this.stateManager.saveState();
        this.canvas.renderAll();
    }
}
The method saveState() is used as a shortcut method to allow other methods to a) save the current state and b) render all objects on the canvas again. saveState() needs to be used in quite a few places, most notably whenever a canvas object is modified, created, or deleted.
class DrawingEditor {
    //...Properties and constructor

    private initializeCanvasEvents() {
    	//...Other events

        this.canvas.on('mouse:up', (o) => {
            this.isDown = false;
            switch (this.cursorMode) {
                //If the cursor mode is currently Draw when a mouseup
                //event occurs, we have just finished dragging to
                //create that object. Hence, we need to add the new
                //state of the canvas to the state manager.
                case CursorMode.Draw:
                    this.isObjectSelected = false;
                    this.saveState();
            }
        });

        //If an object has been modified at all, save the new state
        this.canvas.on("object:modified", (e) => {
            this.saveState();
        });
    }

    //This method is called by the DeleteComponent from Part 5.
    deleteSelected(): void {
        this.canvas.remove(this.canvas.getActiveObject());
        this.canvas.renderAll();

        this.saveState();
    }

    //...Other methods
}
Our DrawingEditor will now save the state of the canvas whenever objects are changed, created, or deleted. But we still need toolbar items for undo/redo. Guess what that means? We need some new display components!
Components for Undo/Redo
First up is the UndoComponent:
class UndoComponent extends ControlComponent {

    constructor(target: string, parent: DrawingEditor) {
        super(
            target, //Selector
            "fa fa-undo", //Icon CSS Classes
            "Undo", //Tooltip
            parent,
            {
                'click': () => { parent.undo(); }
            });
    }

    render() {
        const html = `<button id="${this.target.replace('#', '')}" title="${this.hoverText}" class="btn btn-info">
                        <i class="${this.cssClass}"></i>
                     </button>`;

        $(this.target).replaceWith(html);
    }
}
Nothing too complex here, I think. We also need the RedoComponent:
class RedoComponent extends ControlComponent {

    constructor(target: string, parent: DrawingEditor) {
        super(
            target, //Selector
            "fa fa-repeat", //Icon CSS Classes
            "Redo", //Tooltip
            parent,
            {
                'click': () => { parent.redo(); }
            });
    }

    render() {
        const html = `<button id="${this.target.replace('#', '')}" title="${this.hoverText}" class="btn btn-info">
                        <i class="${this.cssClass}"></i>
                     </button>`;

        $(this.target).replaceWith(html);
    }
}
Just like the other components, we need to modify the DrawingEditor and the Razor Page markup and script:
class DrawingEditor {
//...Properties and constructor
//...Other methods
addComponent(target: string, component: string) {
switch (component) {
//...Other cases
case 'undo':
this.components[component]
= [new UndoComponent(target, this)];
break;
case 'redo':
this.components[component]
= [new RedoComponent(target, this)];
break;
}
}
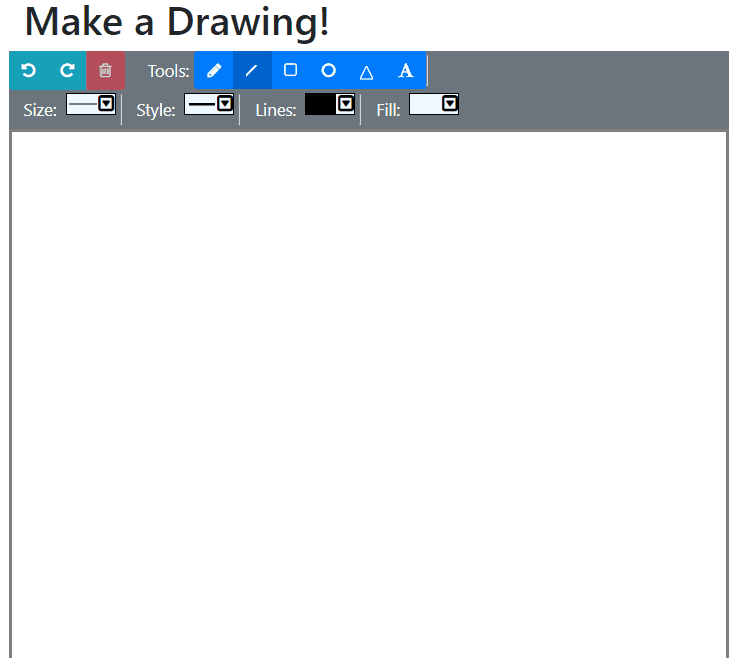
}<div class="row drawingToolbar bg-secondary text-light">
<div class="btn-toolbar">
<div class="btn-group mr-2" role="group">
<div id="undoComponent"></div>
<div id="redoComponent"></div>
<div id="deleteComponent"></div>
</div>
</div>
<!--Shapes toolbar-->
<!--Color, style, and thickness toolbar-->
</div>var editor;
$(function () {
//Instantiate canvas
const components = [
//Other components
{ id: '#undoComponent', type: 'undo' },
{ id: '#redoComponent', type: 'redo' }
];
//...Rest of script
});GIF Time!
Now it's time to see what we've got! Here's a GIF of the undo/redo functionality in action:
That works pretty well, I'd say! Now we have functioning undo/redo calls in our FabricJS canvas!
Summary
In order to implement undo/redo, we needed to do the following:
- Create a StateManager class which could store stacks of canvas state for both undo and redo.
- Create undo and redo components that the user could click on.
Don't forget to check out the sample project over on GitHub!
In the next part of this series, we'll implement our own cut/copy/paste functionality, as well as hotkeys! Check out the penultimate part of Drawing with FabricJS and TypeScript!
 Matthew Jones
Happy Drawing!